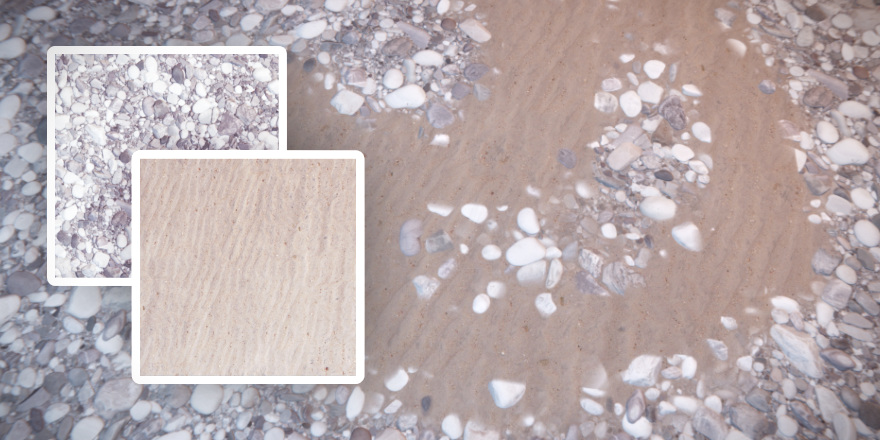
Here’s a stupidly simple godot shader that blends between two PBR texture sets based on red vertex color channel and a height map:
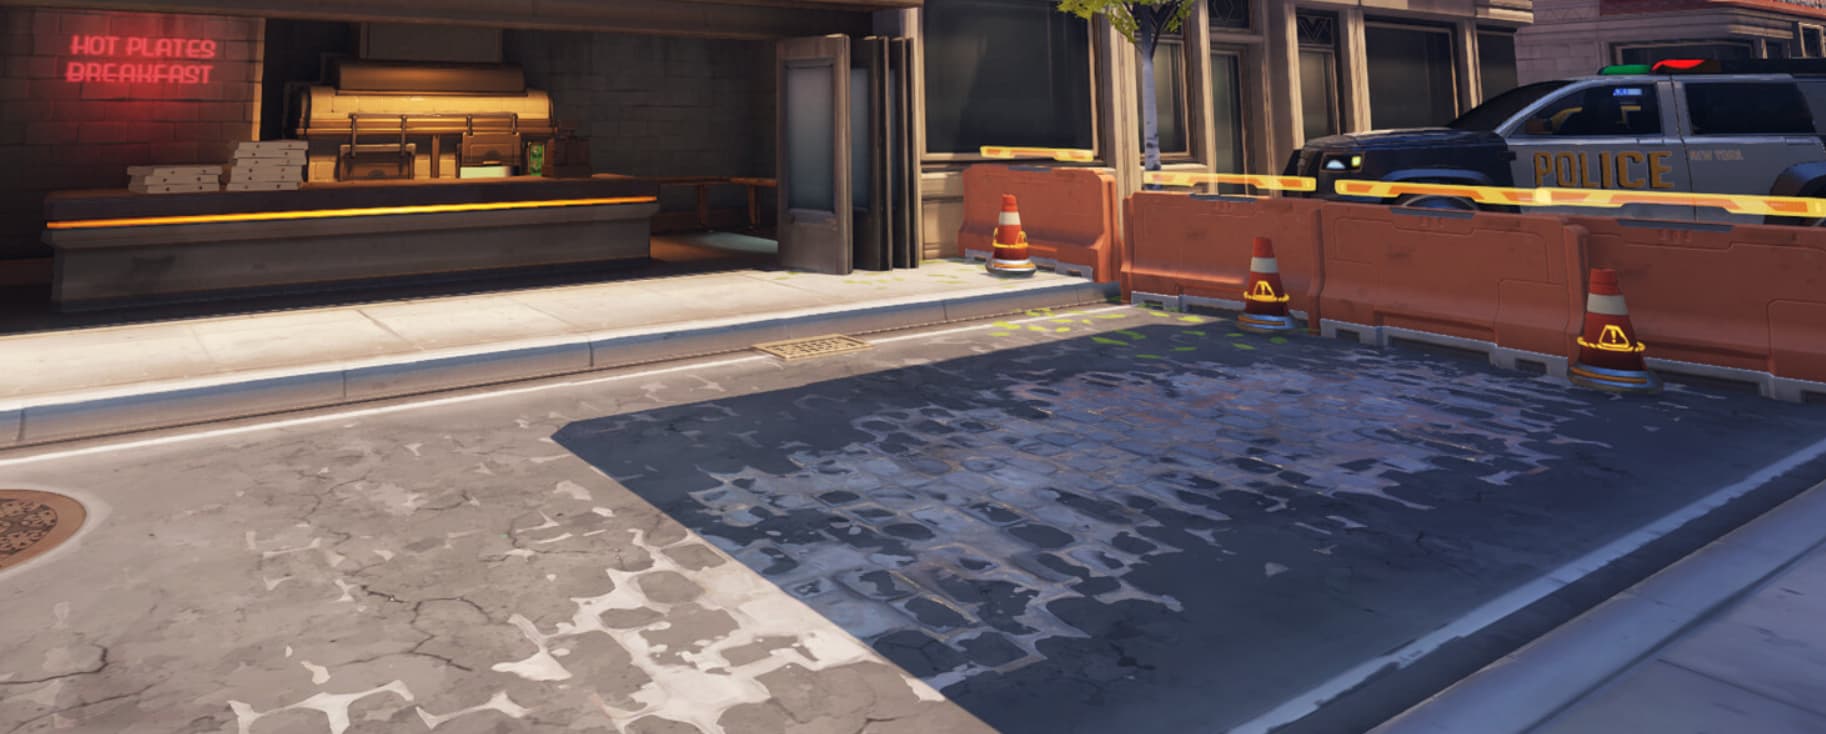
This kind of blending is used in a lot of games. For example it’s what Overwatch does, most surfaces in that game blend between 2 PBR sets based on height and vertex mask to create variety:
You can blend between more than 2 of them of course if you also use other vertex color channels other than red, but it’s a bit more of a pain in the ass to work with and the shader is more complex too. That’d be mostly useful for terrains, but for a terrain shader you’ll probably need more features anyway, i.e normal-based blending, triplanar projection, etc.
I used to go for versatility in the past and make bigger things that can be used in a lot of different scenarios, but now I often go for simplicity and make a bunch of smaller specialized things instead. This way smaller projects are easier to work on because they aren’t bloated with features that they don’t use. That’s why I like simple shaders as well.
Without the uniform declarations, the entire shader is just this:
float burn(float a, float b) {
	return 1.0 - (1.0 - a) / b;
}

float map_curve(float value, sampler2D curve_texture) {
	return texture(curve_texture, vec2(value, 0.0)).r;
}

void fragment() {
	// Main material
	ALBEDO = texture(albedo_base, UV).rgb * modulate_base.rgb;
	NORMAL_MAP = texture(normal_base, UV).rgb;
	NORMAL_MAP_DEPTH = normal_scale_base;
	ROUGHNESS = texture(roughness_base, UV).r;
	SPECULAR = specular_base;

	float mask = clamp(burn(
		map_curve(COLOR.r, vertex_color_curve_r),
		map_curve(texture(height_base, UV).r, height_curve_r)
	), 0.0, 1.0);

	// Red channel material
	ALBEDO = mix(ALBEDO, texture(albedo_r, UV).rgb * modulate_r.rgb, mask);
	NORMAL_MAP = mix(NORMAL_MAP, texture(normal_r, UV).rgb, mask);
	ROUGHNESS = mix(ROUGHNESS, texture(roughness_r, UV).r, mask);
	SPECULAR = mix(SPECULAR, specular_r, mask);
	NORMAL_MAP_DEPTH = mix(NORMAL_MAP_DEPTH, normal_scale_r, mask);
}
The map_curve function exists just for readability, it could be inlined but it’s harder to understand the intent without it.
Remapping the vertex color through curve allows you to control how abrupt the vertex paint mask transition will be, and remapping the height map does the same but for the height mask. The latter curve you usually draw inverted because for the second material it makes sense to appear in crevices rather than on high points of the base material. Together those two curves let you achieve any blend you want.
Alternatively we could expose a bunch of floats, but even if you only do curve endpoints that’s already 8 floats for two curves and you still dont get control over the shape of how the value is eased in between of those, and I found that just using smoothstep might not always give good results depending on what the heightmap looks like. Curves just work better overall once you get used to them.
Another alternative is GradientTexture1D, which also works with this shader since it’s just another type of texture. Gradient gives slightly less control because you can only choose between linear and cubic interpolation between points, but it’s still a big usability/maintainability improvement over floats. Whether to use gradients or curves is mostly a matter of preference.
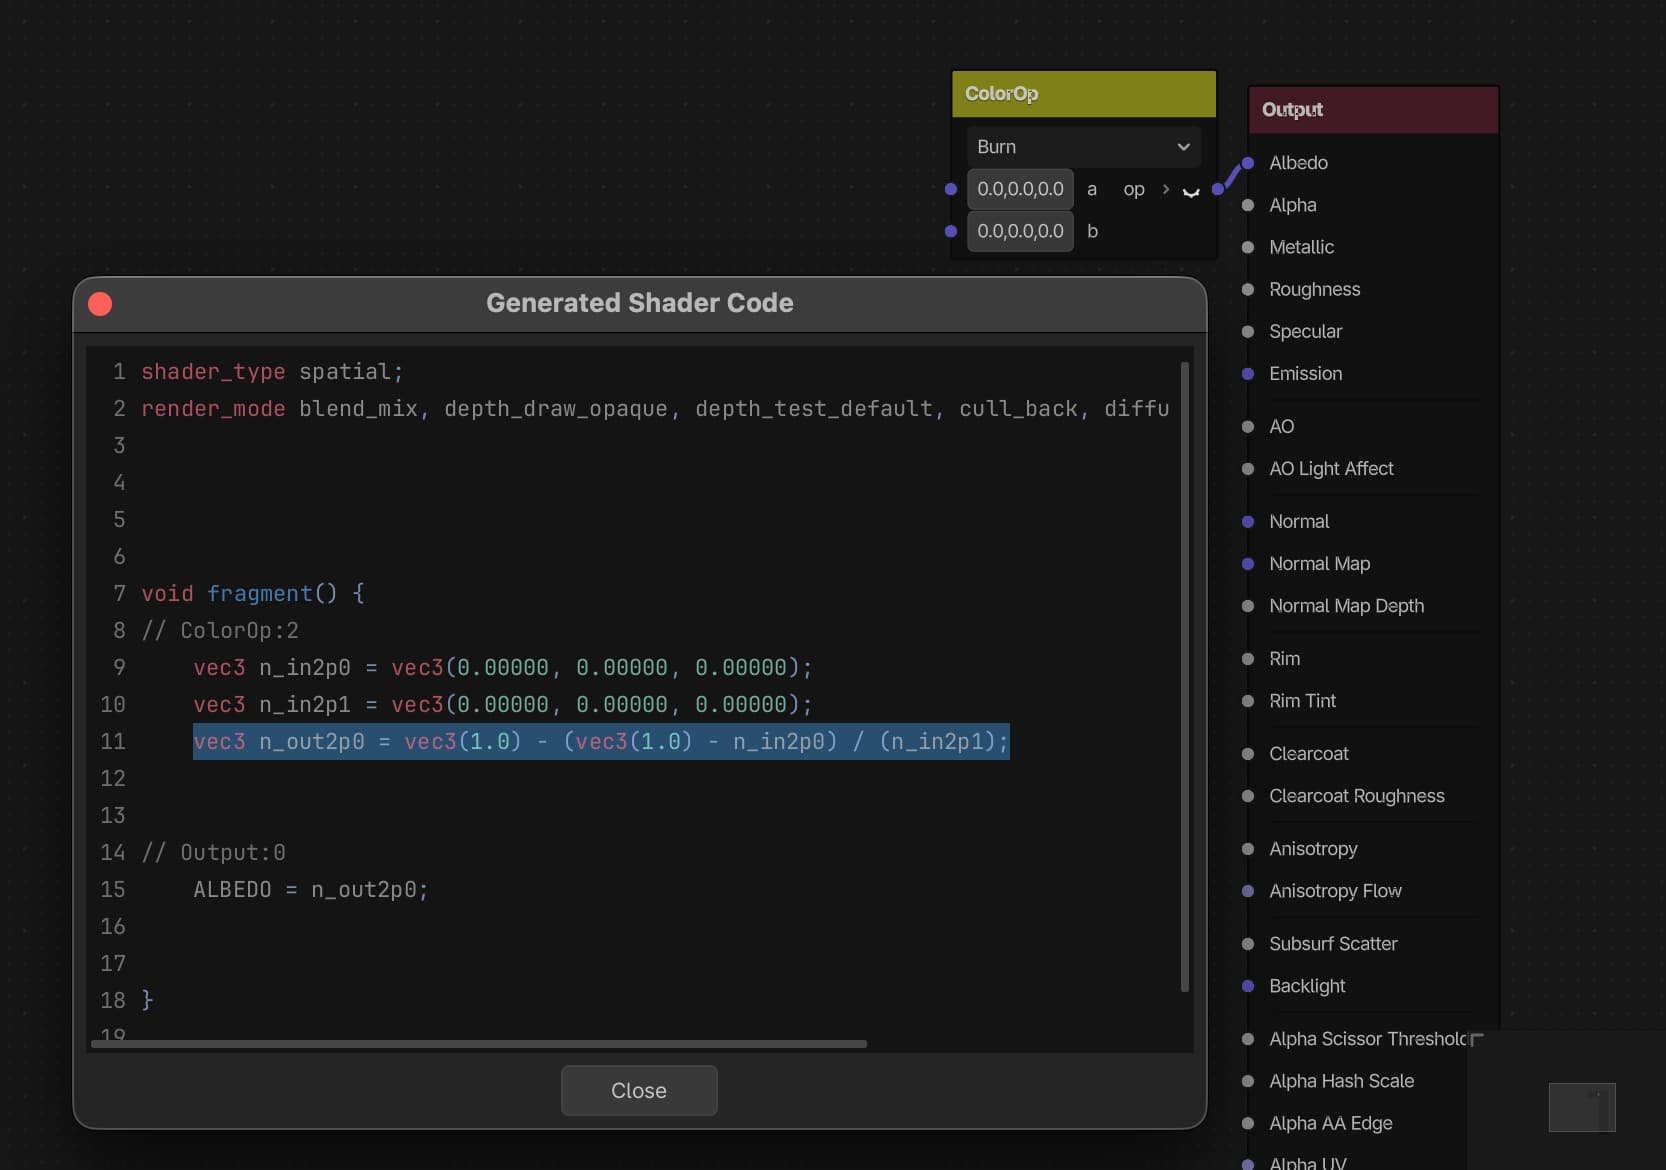
Burn blend mode is something I found to work best while texturing with ucupaint, so I just used it in this shader too. Godot already has it in visual shaders, so I just yoinked its code:
Y u no visual shaders?
I usually like visual scripting and visual shader editors but in godot I found that it’s easier for me to write code. I probably got spoiled by how good graph editor UX is in blender, godot is still a bit behind in that regard. Maybe one day.
In this shader I didn’t include UV scale/offset uniforms because I never use those, I just scale UVs in blender. Because I need blender to paint anyway. Those UV params are trivial to add though.
Vertex painting in blender
I use blender as a level editor and do most of things in it, including vertex painting:
Since this shader only uses the red channel I don’t care about painting only red and just paint on all channels instead (white vertex color).
In blender you can press X to quickly switch between black/white vertex colors while painting.
Why paint in blender?
Doing vertex painting in engine would be appealing, and there are addons to do that in godot, but there’s no good way to do it if you iterate on level geometry externally, because re-importing modified geometry will break vertex colors in engine. And for now you kinda have to model externally because there are no good tools to model in godot so far. Whatever the solution for storing vertex color data on godot side may be, that data won’t survive re-import if the level geometry changes significantly, i.e if you add or remove faces from it. Blender does a good job to preserve all vertex data when you model, including vertex colors.
The upside of using a simple height blend shader in godot is that it’s trivial to recreate it in ucupaint, you just need to add the same two masks (height and vertex color) and draw roughly the same two curves for them.
I use ucupaint for all materials, including in this case the two materials that I blend between, even if those are just regular PBR sets from polyhaven because I usually want to tweak colors on those.
To do that I first set up ucupaint materials for those on separate planes and bake them. Then I use those baked materials in the main ucupaint material:
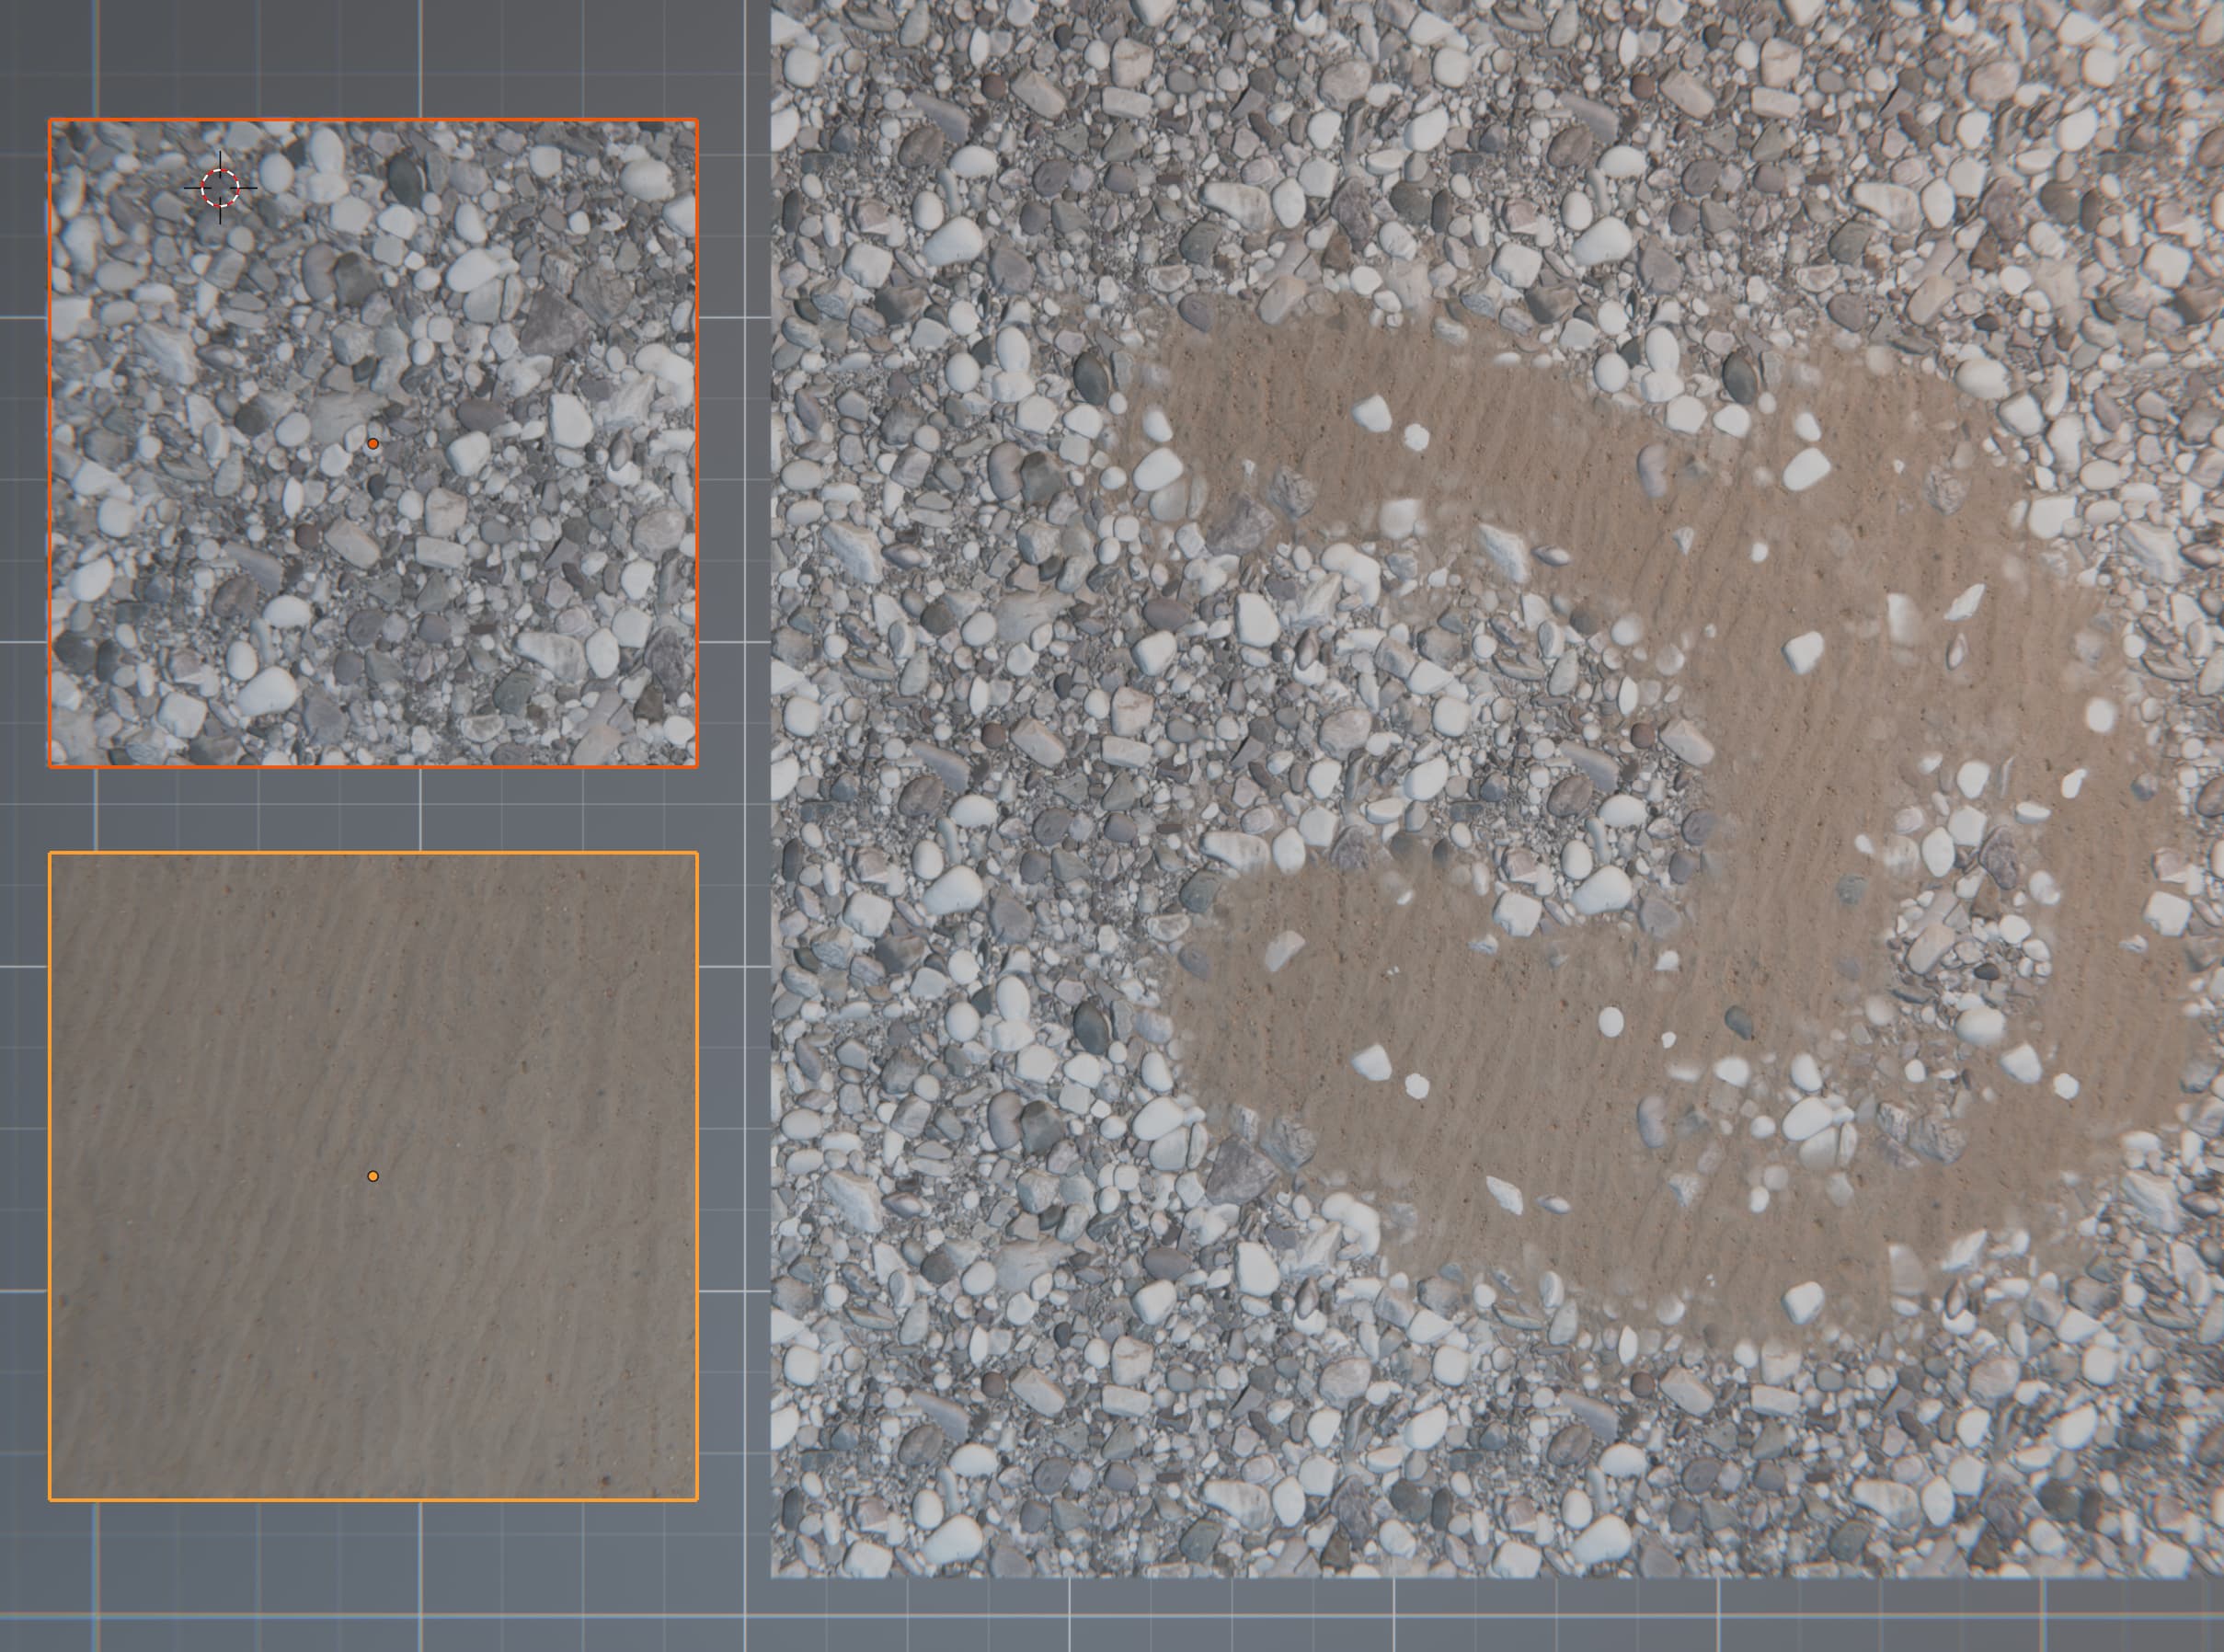
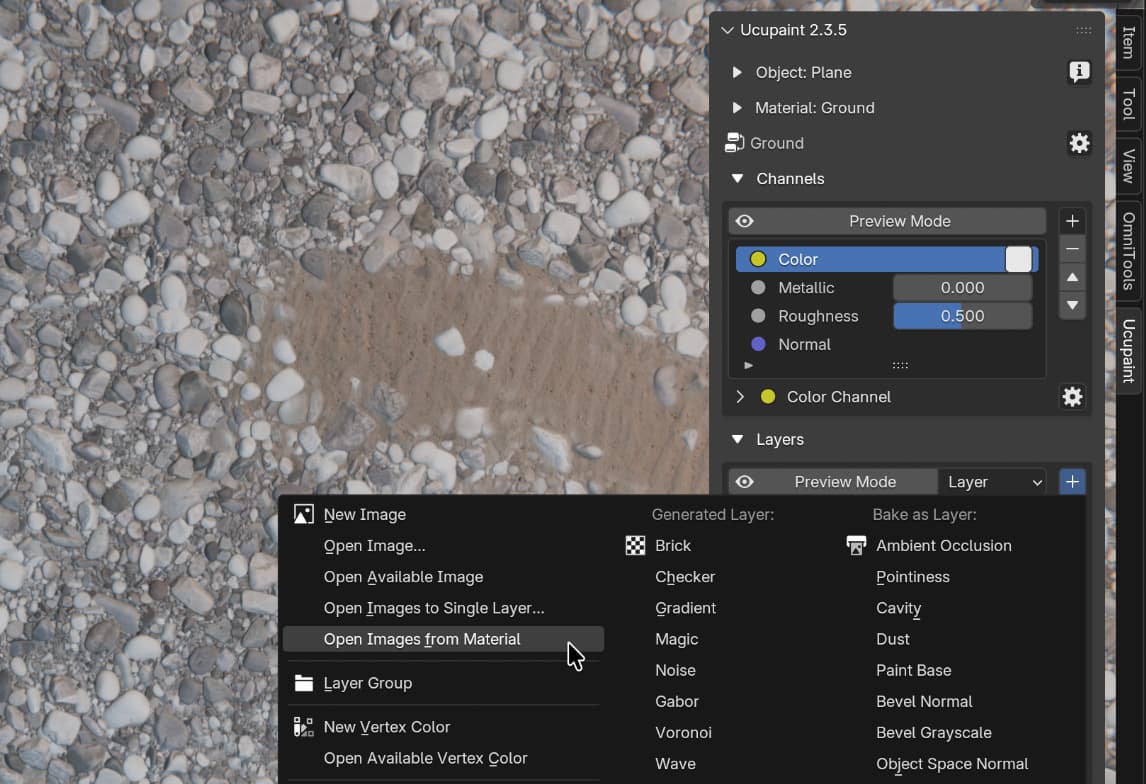
To use a baked PBR material as a layer in another ucupaint material you can use the Open Images from Material button:
The main material has two layers, and the top layer, which is sand, has vertex color mask, and image mask (the heightmap of the pebble material) that I added with the Open Available Image as Mask button. The heightmap is blended in Burn mode, and both masks have a curve on them to tweak their values, just like in our godot shader:
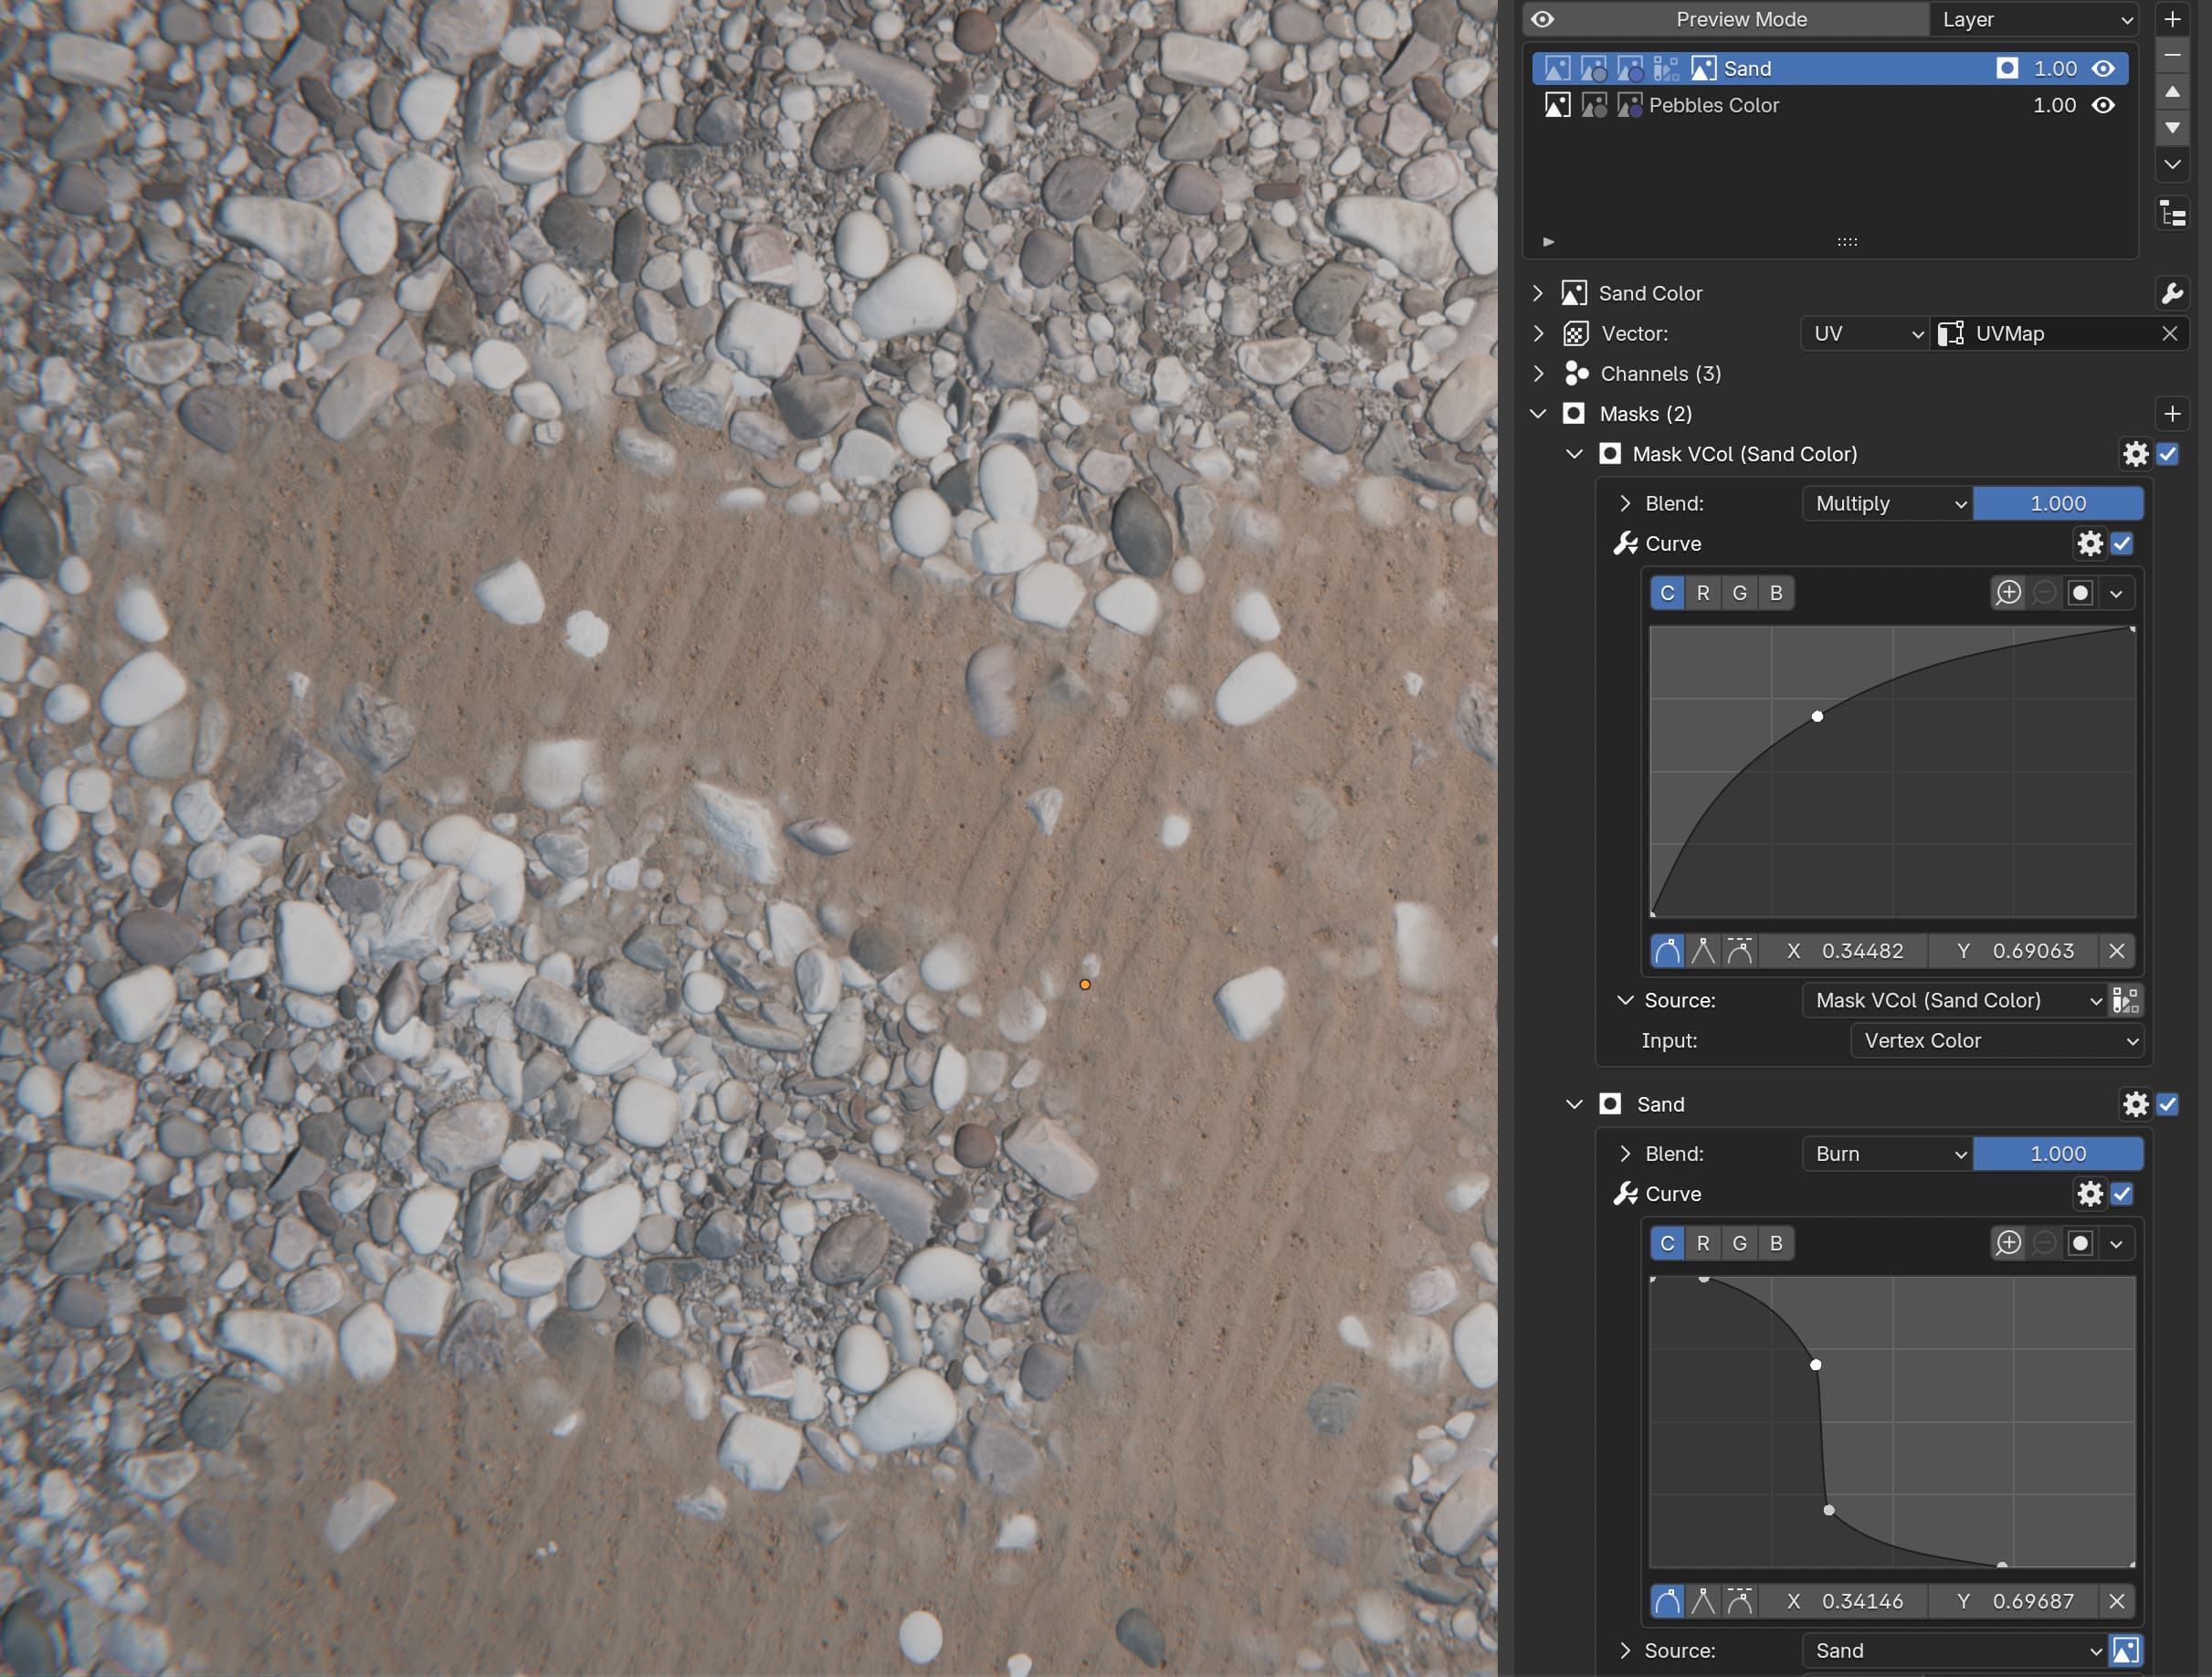
Since this this is just for preview it doesn’t matter if they are blended in the exact same way as in engine, so drawing a roughly similar curve does the trick.
Exporting from blender to godot
The main ucupaint material that is used for preview in blender can’t be exported to godot, at least not via glTF, it needs to be recreated in godot manually. Once the material is recreated and saved as .tres it’s possible to manually swap it for surfaces that need it on import based on material name or metadata with a simple import addon, but that’s a topic for another post.
As for the process of creating the material in godot itself, it’s just a matter of dragging textures into slots. Keep in mind however that glTF doesn’t support displacement (height) maps. So if you used ucupaint to tweak PBR materials before baking and exporting them, you’ll find that displacement map is missing from those exported maps. Ucupaint does bake them, but glTF exporter doesn’t export them.
You can get the baked displacement map if you unpack textures via Files->External Data->Unpack Resources. The displacement map will end up in a different directory than what glTF exporter uses but you can copy it there manually.
If this seems like a lot of work for something very simple to you, I agree. When it comes to pipelines a lot of things are developed internally and never shared or standardized. So we have to either do manual work or come up with our own import/export plugins to make things manageable. Hopefully this workflow will be simpler one day.
Some notes
mix() might not be the best way to blend between two normal maps but it doesn’t matter in this shader because it’s made for abrupt transitions (remember the mask uses Burn blending) so you usually see either one map or the other. Better normal blending might not be worth the extra shader complexity here.
This shader also only blends based on height of one of the materials instead of comparing the height of both of them. Second height texture might not be worth the trouble because it won’t give a noticeable difference to justify shipping the second heightmap.
I guess it’s about finding the balance between accuracy and complexity based on what a project needs.